TIL#4: Tự động đánh hashtag cho ảnh chụp sử dụng Firebase ML Kit
#Lưu ý trong bài viết mình xin phép chèn 1 số từ tiếng Anh vào, vì nếu dịch sang tiếng Việt nghe sẽ rất … ngớ ngẩn.

Hi anh em! Tiếp nối series TIL sẽ lại là 1 bài về ML Kit. Ở bài trước, mình có giới thiệu sơ sơ về ML Kit cũng như sử dụng thử 1 tính năng của nó cho text translation, ae có thể tìm hiểu ở đây: TIL#3: Text Translation sử dụng Firebase ML Kit
1. Mục tiêu bài viết
Trong phần này, chúng ta cũng sẽ dùng thử tiếp 1 tính năng có sẵn khác vô cùng thú vị, và mình cũng nghĩ nó cũng thiết thực. Đó là Image Labeling (hay còn gọi là dán nhãn cho ảnh)
Use case triển khai sẽ vô cùng đơn giản: User sẽ mở camera, chụp 1 object bất kỳ, Sau đó 1 list các hashtag sẽ được hiển thị để gợi ý.
2. Triển khai
Kịch bản
Các bước thực hiện như sau:
- Bước 1: User mở camera có tính năng chụp
- Bước 2: Ấn nút chụp, ảnh kết quả sẽ được lưu trong storage
- Bước 3: Lấy ảnh vừa chụp từ storage, phân tích ảnh và hiển thị hashtag tương ứng
Kết quả mong muốn:
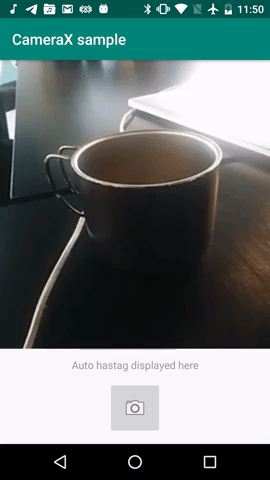
Giao diện
Giao diện tương đối cơ bản, ta có thể khởi tạo như sau:
<?xml version="1.0" encoding="utf-8"?>
<androidx.appcompat.widget.LinearLayoutCompat xmlns:android="http://schemas.android.com/apk/res/android"
    xmlns:app="http://schemas.android.com/apk/res-auto"
    xmlns:tools="http://schemas.android.com/tools"
    android:layout_width="match_parent"
    android:layout_height="match_parent"
    android:gravity="center_horizontal"
    android:orientation="vertical"
    tools:context=".MainActivity">

    <TextureView
        android:id="@+id/view_finder"
        android:layout_width="match_parent"
        android:layout_height="0dp"
        android:layout_marginBottom="12dp"
        android:layout_weight="1"
        app:layout_constraintBottom_toTopOf="@+id/capture_button"
        app:layout_constraintEnd_toEndOf="parent"
        app:layout_constraintStart_toStartOf="parent"
        app:layout_constraintTop_toTopOf="parent" />

    <androidx.appcompat.widget.AppCompatTextView
        android:id="@+id/autoHashtagText"
        android:layout_width="match_parent"
        android:layout_height="wrap_content"
        android:gravity="center"
        android:hint="Auto hastag displayed here"
        android:paddingHorizontal="12dp" />

    <ImageButton
        android:id="@+id/capture_button"
        android:layout_width="72dp"
        android:layout_height="72dp"
        android:layout_margin="12dp"
        android:contentDescription="Capture button"
        app:layout_constraintBottom_toBottomOf="parent"
        app:layout_constraintEnd_toEndOf="parent"
        app:layout_constraintStart_toStartOf="parent"
        app:srcCompat="@android:drawable/ic_menu_camera" />
</androidx.appcompat.widget.LinearLayoutCompat>
Và giao diện kết quả:
Cài đặt thư viện
Để có thể sử dụng đc các tính năng này của ML Kit, trước hết ta phải kết nối đến 1 firebase project. Bạn có thể tham khảo ở đây để có hướng dẫn chi tiết.
Sau khi kết nối xong, chuyển sang phần dependencies. Ở đây mình sử dụng 2 dependency là CameraX để điều khiển camera, và Image Label của ML Kit để dán nhắn kết quả:
dependencies {
    ...
    def camerax_version = "1.0.0-alpha05"
    implementation "androidx.camera:camera-core:${camerax_version}"
    implementation "androidx.camera:camera-camera2:${camerax_version}"

    implementation 'com.google.firebase:firebase-ml-vision:23.0.0'
    implementation 'com.google.firebase:firebase-ml-vision-image-label-model:18.0.0'
}
Đã xong bước cài đặt. Bây giờ ta sẽ tiến hành triển khai các tính năng của nó
Chụp ảnh sử dụng CameraX
CameraX là bộ thư viện Camera mới được giới thiệu cùng với Android JetPack, cung cấp tương đối nhiều tính năng thú vị (Như preview, capture, image analyzer …) và cách triển khai cũng tương đối đơn giản.
Với TextureView đã khai báo trong UI XML, ta sẽ tiến hành khởi tạo các tính năng của camera là Preview và Capture như sau:
override fun onCreate(savedInstanceState: Bundle?) {
        super.onCreate(savedInstanceState)
        setContentView(R.layout.activity_main)

        // Request camera permissions
        if (allPermissionsGranted()) {
            view_finder.post { startCamera() }
        } else {
            ActivityCompat.requestPermissions(
                this, REQUIRED_PERMISSIONS, REQUEST_CODE_PERMISSIONS
            )
        }

        // Every time the provided texture view changes, recompute layout
        view_finder.addOnLayoutChangeListener { _, _, _, _, _, _, _, _, _ ->
            updateTransform()
        }
    }

    override fun onRequestPermissionsResult(
        requestCode: Int,
        permissions: Array<out String>,
        grantResults: IntArray
    ) {
        if (requestCode == REQUEST_CODE_PERMISSIONS) {
            if (allPermissionsGranted()) {
                view_finder.post { startCamera() }
            } else {
                Toast.makeText(
                    this,
                    "Permissions not granted by the user.",
                    Toast.LENGTH_SHORT
                ).show()
                finish()
            }
        }
    }

    private fun allPermissionsGranted() = REQUIRED_PERMISSIONS.all {
        ContextCompat.checkSelfPermission(
            baseContext, it
        ) == PackageManager.PERMISSION_GRANTED
    }
- Camera cần phải được cung cấp permission trước khi sử dụng, vì thế ta cần phải check permission qua
allPermissionsGranted(). Trong trường hợp chưa có permission, ta sẽ gọiActivityCompat.requestPermissions()và xử lý result ởonRequestPermissionsResult(). updateTransform()xử lý preview trong trường hợp orientation của device bị thay rồi
    private fun updateTransform() {
        // TODO: Implement camera viewfinder transformations
        val matrix = Matrix()

        // Compute the center of the view finder
        val centerX = view_finder.width / 2f
        val centerY = view_finder.height / 2f

        // Correct preview output to account for display rotation
        val rotationDegrees = when (view_finder.display.rotation) {
            Surface.ROTATION_0 -> 0
            Surface.ROTATION_90 -> 90
            Surface.ROTATION_180 -> 180
            Surface.ROTATION_270 -> 270
            else -> return
        }
        matrix.postRotate(-rotationDegrees.toFloat(), centerX, centerY)

        // Finally, apply transformations to our TextureView
        view_finder.setTransform(matrix)
    }
startCamera()sẽ là hàm chính để khởi tạo các chức năng của camera:
    private fun startCamera() {
        // Bind use cases to lifecycle
        CameraX.bindToLifecycle(this, buildPreview(), buildImageCapture(), buildAnalyzer())
    }
buildPreview()sẽ trả về 1 UseCase xử lý Preview:
    private fun buildPreview(): UseCase? {
        val previewConfig = PreviewConfig.Builder().build()

        // Build the viewfinder use case
        val preview = Preview(previewConfig)

        // Every time the viewfinder is updated, recompute layout
        preview.setOnPreviewOutputUpdateListener {
            // To update the SurfaceTexture, we have to remove it and re-add it
            val parent = view_finder.parent as ViewGroup
            parent.removeView(view_finder)
            parent.addView(view_finder, 0)

            view_finder.surfaceTexture = it.surfaceTexture
            updateTransform()
        }
        return preview
    }
buildImageCapture()sẽ trả về 1 UseCase xử lý Capture:
    private fun buildImageCapture(): UseCase? {
        // Create configuration object for the image capture use case
        val imageCaptureConfig = ImageCaptureConfig.Builder()
            .apply {
                setTargetAspectRatio(Rational(1, 1))
                // We don't set a resolution for image capture; instead, we
                // select a capture mode which will infer the appropriate
                // resolution based on aspect ration and requested mode
                setCaptureMode(ImageCapture.CaptureMode.MIN_LATENCY)
            }.build()

        // Build the image capture use case and attach button click listener
        val imageCapture = ImageCapture(imageCaptureConfig)
        capture_button.setOnClickListener {
            val file = File(
                externalMediaDirs.first(),
                "${System.currentTimeMillis()}.jpg"
            )

            imageCapture.takePicture(file,
                object : ImageCapture.OnImageSavedListener {
                    override fun onError(
                        error: ImageCapture.ImageCaptureError,
                        message: String, exc: Throwable?
                    ) {
                        val msg = "Photo capture failed: $message"
                        Toast.makeText(baseContext, msg, Toast.LENGTH_SHORT).show()
                        exc?.printStackTrace()
                    }

                    override fun onImageSaved(file: File) {
                        val image: FirebaseVisionImage
                        try {
                            image =
                                FirebaseVisionImage.fromFilePath(this@MainActivity, file.toUri())
                            labelImage(image)
                        } catch (e: IOException) {
                            e.printStackTrace()
                        }

                    }
                })
        }
        return imageCapture
    }
Ở đây ta có thể thấy trong hàm buildImageCapture(), khi takePicture() thành công và file ảnh được lưu lại, ta sẽ convert về định dạng ảnh của FirebaseVision là FirebaseVisionImage và được truyền vào hàm labelImage() phụ trách việc dán nhãn (Sẽ được mô tả ở phần dưới).
Tính năng Image Labeling
Tiếp theo chúng ta sẽ làm việc với thư viện Image Label của ML Kit.
Sau khi đã thêm dependency vào app/build.bundle, chúng ta sẽ làm thêm 1 bước nữa là config AndroidManifest để tự động tải Image Label Model, nếu không có Model này thì chức năng sẽ không hoạt động được.
    <application
        android:allowBackup="true"
        android:icon="@mipmap/ic_launcher"
        android:label="@string/app_name"
        android:roundIcon="@mipmap/ic_launcher_round"
        android:supportsRtl="true"
        android:theme="@style/AppTheme">
        ...

        <meta-data
            android:name="com.google.firebase.ml.vision.DEPENDENCIES"
            android:value="label" />
    </application>
Cuối cùng là xử lý label cho hàm labelImage():
    private fun labelImage(image: FirebaseVisionImage) {
        val options =
            FirebaseVisionOnDeviceImageLabelerOptions.Builder().setConfidenceThreshold(0.5f).build()

        FirebaseVision.getInstance().getOnDeviceImageLabeler(options).processImage(image)
            .addOnSuccessListener { labels ->
                // Task completed successfully
                // ...
                val result = labels.fold("", { acc, label ->
                    acc + "#" + label.text + " "
                })

                autoHashtagText.text = result
            }
            .addOnFailureListener { e ->
                // Task failed with an exception
                e.printStackTrace()
            }
    }
- Trong trường hợp này mình chiwr sử dụng On-device model để thực hiện việc labeling thông qua hàm
getOnDeviceImageLabeler(), cho nên số lượng label sẽ tương đối hạn chế và không đủ độ chi tiết. Để sử dụng model có độ chi tiết và chính xác cao hơn, bạn có thể đổigetOnDeviceImageLabeler()thànhgetCloudImageLabeler(), tuy nhiên tính năng này yêu cầu chúng ta phải trả phí nên mình không ví dụ được ở đây. - Mỗi label đều có độ chính xác
confidenceđi kèm, nếu muốn giới hạn chỉ lấy những nhãn có độ tin cậy cao, bạn có thể sử dụngsetConfidenceThreshold()như ở trên khi định nghĩaFirebaseVisionOnDeviceImageLabelerOptions:
for (label in labels) {
  val text = label.text
  val entityId = label.entityId
  val confidence = label.confidence
}
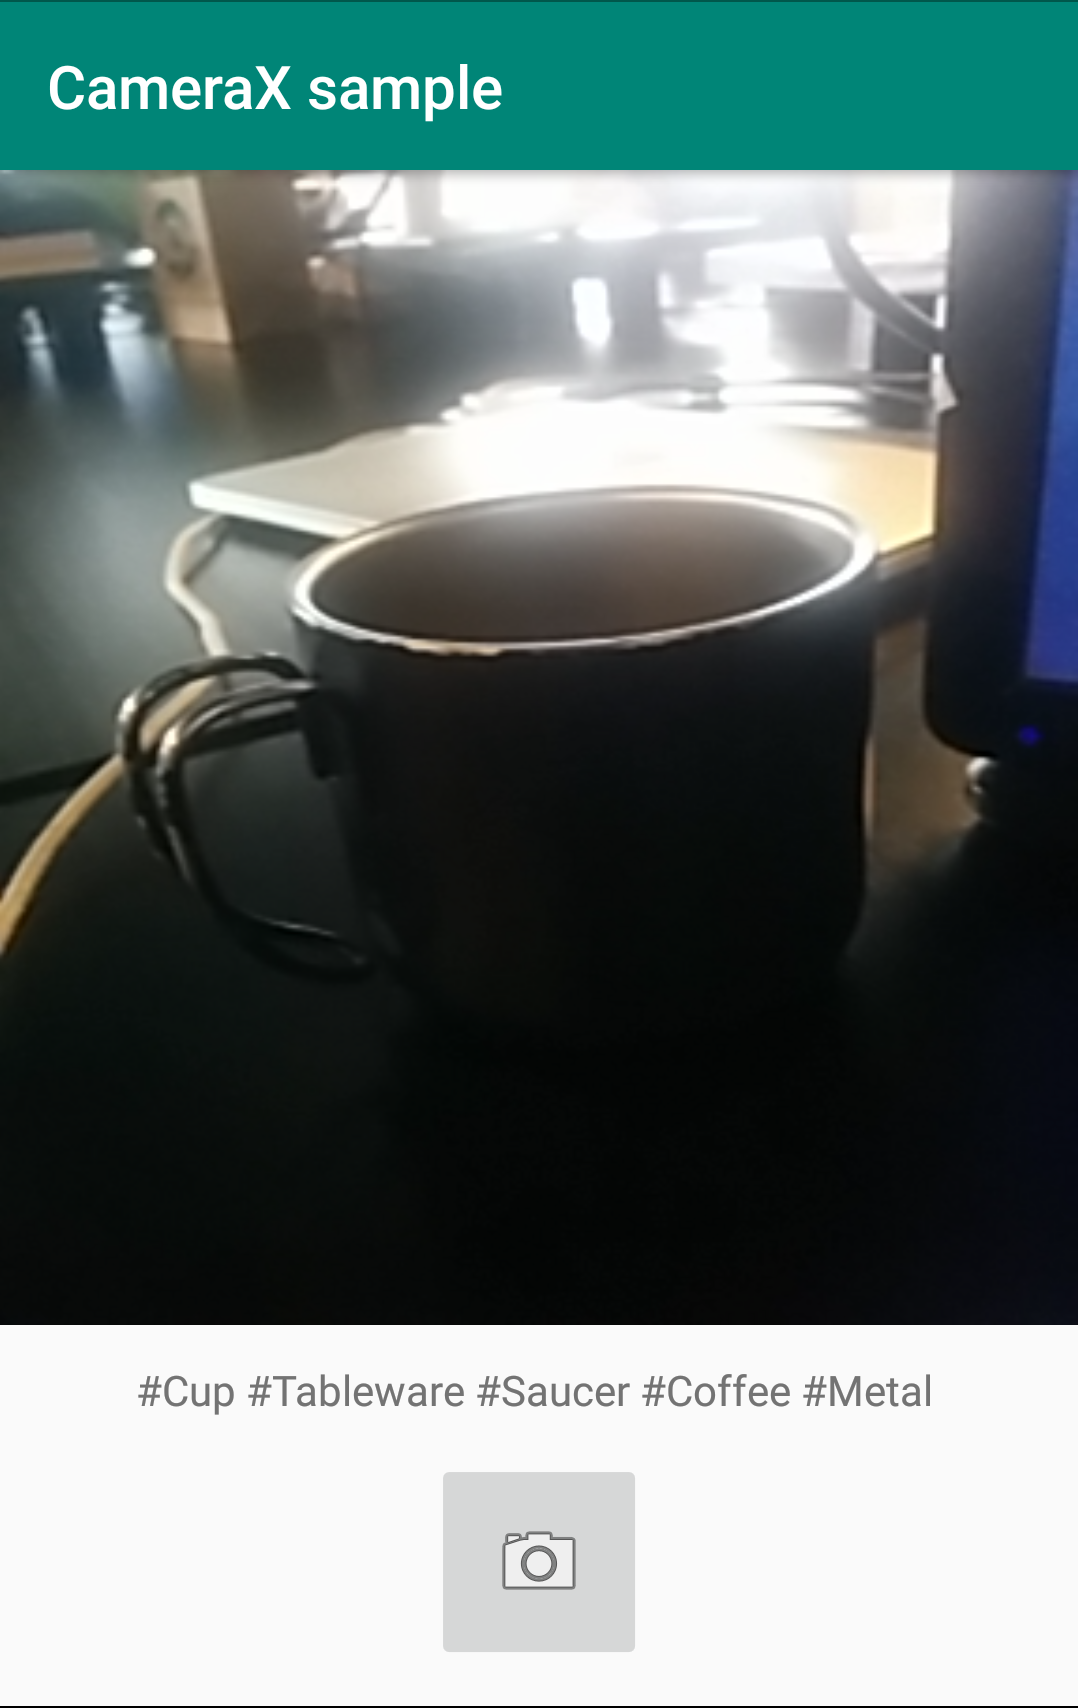
Và kết quả cuối cùng:
Tuyệt vời ! Nhìn chung nó đã trả về được những label tương đối liên quan đến ảnh chụp, cũng tạm gọi là thành công rồi :D
3. Kết
ML Kit còn rất nhiều tính năng khác vô cùng thú vị, và mình cũng thấy nó xử lý được tương đối nhiều bài toàn thực tiễn.
Ngoài ra nếu bạn muốn đưa các model riêng của mình vào trong ứng dụng (bằng TensorFlow chẳng hạn), ML Kit cũng hỗ trợ importing và compressing model để phù hợp hơn vs kích cỡ của ứng dụng di động. Phần này các bạn có thể đọc thêm trên trang chủ của firebase ở đây.
Thanks and Happy coding!